Saturday, November 19, 2022

no more skinny legs

from 10-16-2022


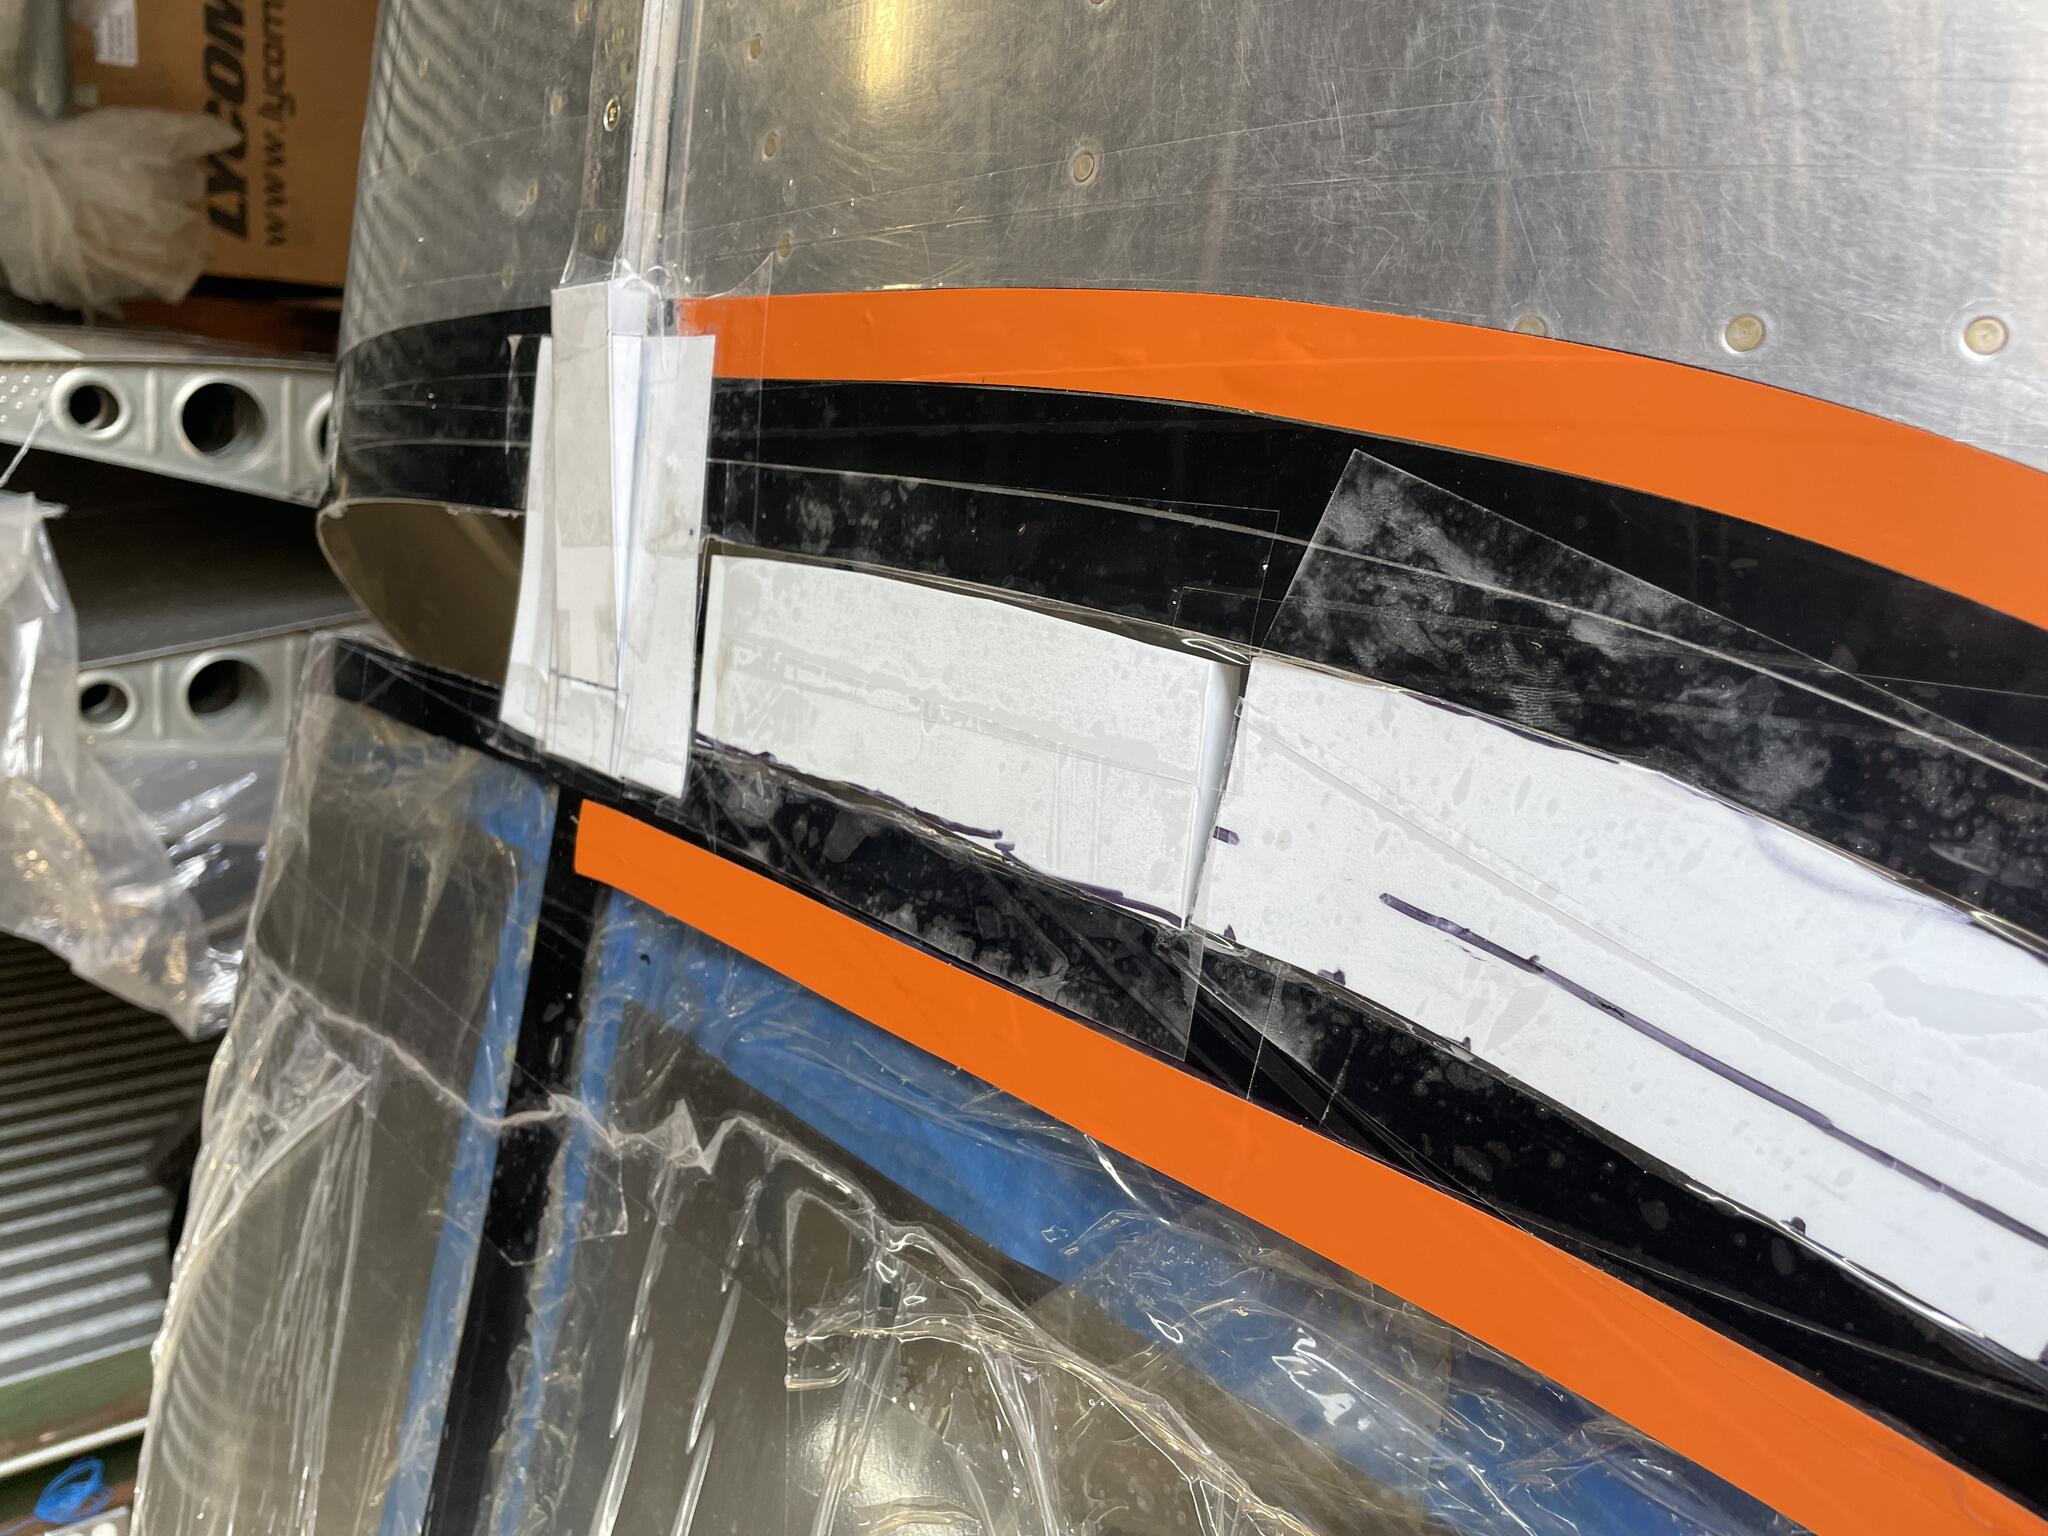
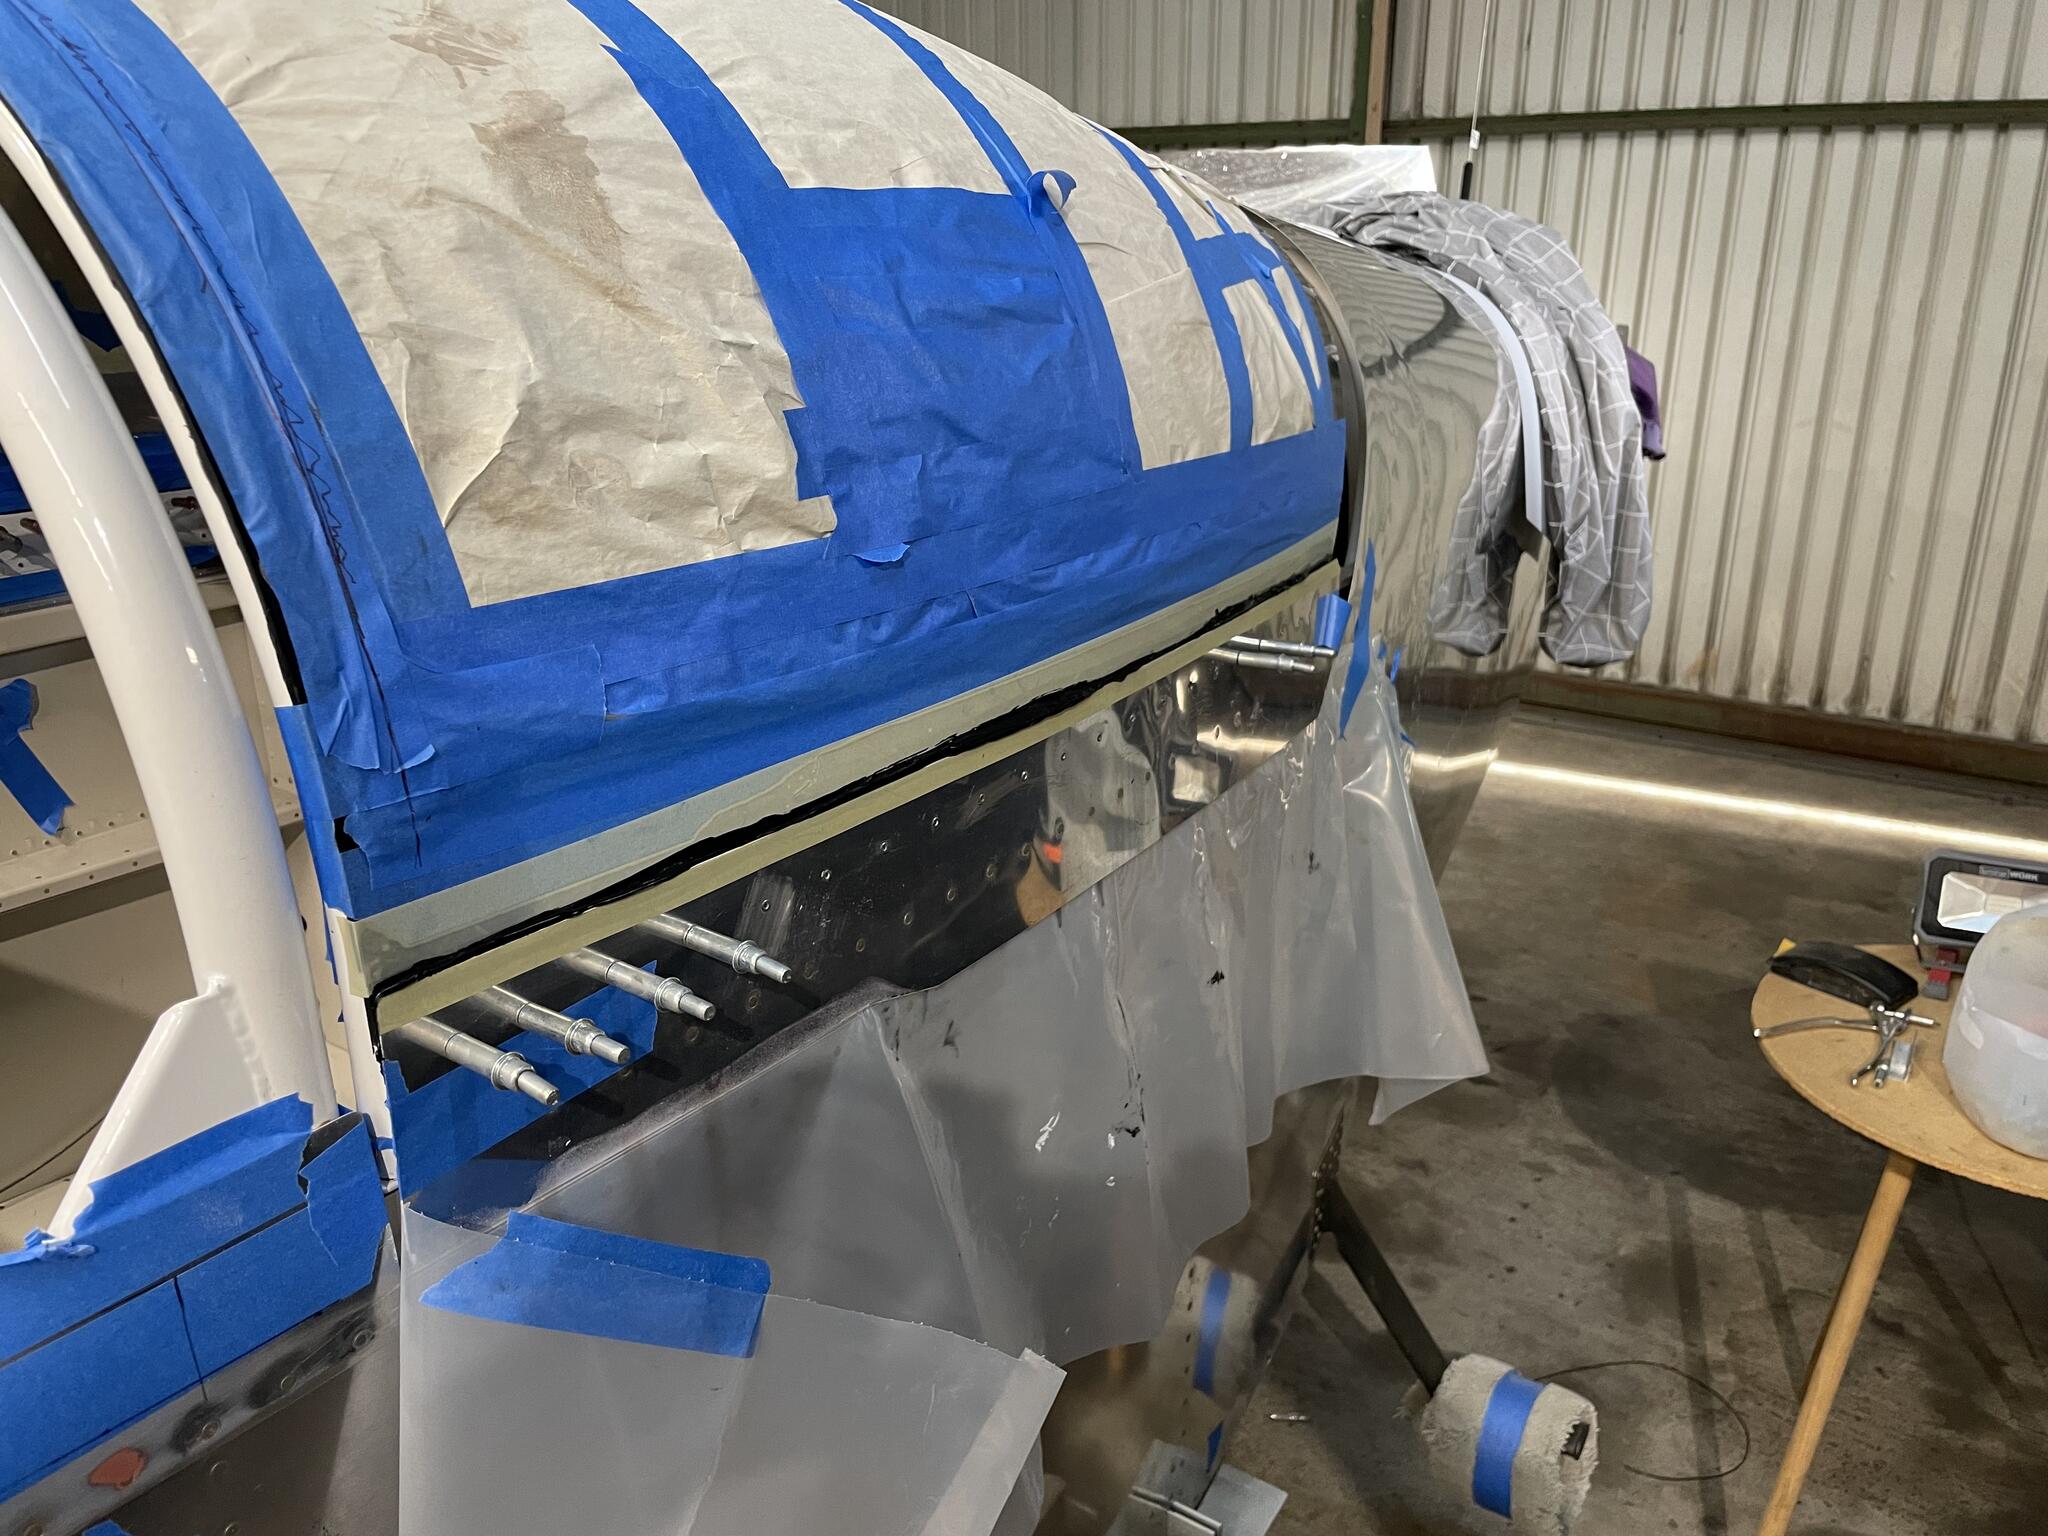
 I was able to get the wheel pants and the leg fairings on this last week. No more skinny legs.


Using two laser levels from Harbor Freight made it easier than the factory instructions. One level kept it aligned, the second was used to mark where to drill the holes in the brackets when the pants were placed on.

As you can see in the picture, I did it before the wings were on. I can not see doing this with the wings on. I pity the fool...Mr T


from 10/29/22
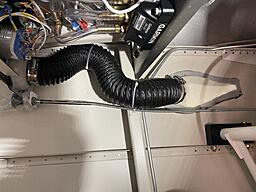
After the fairings were fitted, I took them off and added gear leg stiffeners. In the past, others have reported the rod steel gear legs wuld shimmy. This is most likely due to the fact that the gear legs can move up and down, fore and back, with the same easiness. The gear leg stiffeners make the gear resist the fore and aft shimmy, abut do not detract from the up and down flex.

Traditionally these have been made of wood molding from Lowe's and then fiber glassed onto the gear legs, under the fairings. Lately, others have started using metal strips held on with clamps. 


I followed Paul Dye’s lead and used adel clamps, one of each size and one layer of gorrilla tape instead of the rubber inserts. I wanted some adhesive that would grip the legs and not let the clamps wiggle down the tapered leg.

I bent the adel clamps so the gap was centered on the hoop, if that makes sense. I ended up putting the metal between the adel clamps to align the metal with the centroid of the legs.

For screws I used steel button head allen type 10-32s and thin (shear) self locking nuts.

The clamps worked out to be exactly the same distance apart with the total distance between top clamp and lowest about 20.25”

I am really happy with the way it turned out, but proof is in the first flight. Tell then….


Panel Clean up

 from 10/12/22

I re installed the instruments and cleaned up as much as I could inside the plane. Once the wings are on, it will be impossible to get in there. 


Wheels and brakes


 from 9/24/22

Well cowling hold down pins are in and done.

I cleaned up the inside fuselage area, like tying up wires, adjusting flap mechanism, installing alternate static switch, etc

Also re installed all instruments and completed panel.

Started on the wheels and brakes, hoping to get this thing to stand on its legs soon.

The brakes and wheels installation really took some research. Thanks to those who came before for posting.

And the second picture: Gear On!


Sunday, August 21, 2022

Cowling stuff

 I glued on the windscreen and aft canopy skirt with Sikaflex; This went as planned with no real drama.


I am working on the cowling now. I have the new nose gear, so the bottom is attached not with hinge material, but rather with screws into a plate. The sides and top still use the hinges.

I decided long ago that I would get the cowling and baffling done before putting the plane on the gear. So far the plan is working out well.

Today I drilled the bottom attachment screws 1/8" for cleco's. I will up drill for the 8-32 screws once every thing fits.

I found getting the front of the top and bottom sections trimmed and fitted was the secret to making the rear part line up correctly.

Attached is a picture of how I used a bottle jack to push everything into position to drill the bottom screw holes. Having the plane on a low stand, and not on the gear, really paid off.

I just need to do final trim on the fuse sides and the cowling sides, then install the hinges.

I will probably finish the baffles, the flap motor, elevator control linkages, and all the stuff inside before putting it on the gear.


Help in the shop

 So I started the canopy and had a little help in the shop.


Canopy Done? say it aint so....


 8/5/22 Update


So I think my windscreen frame and aft skirt is done for now. They are primed and (nearly) ready for the painter. I say nearly because it was perfect until I tried a quick repair and ended up making a depression when trying to fix a small pinhole; the prep for paint will have to take care of it.


I plan to have them glued on this week using Sikaflex.

Commenting from a earlier post, the fiberglass using the Aeroepoxy is plenty strong with only 4 layers of 9 oz. I had 5 on the front canopy windscreen frame so if a passenger grabs it it would not crack. the aft skirt is 4 layers and it is plenty strong enough. I really like the Aeroepoxy. I only had one batch that didn't set up properly (possibly operator error?). I found waiting 3 days after the layup was necessary to sand properly.

I am already starting the cowl, which I expect to be easier since that is just fitting an existing part, as opposed to creating the windscreen frame and aft skirt from scratch. I learned a lot, but I wish I can stop learning and get finished.....

I thought this would take me a month, it took me three. A non-removal windscreen and aft skirt would have been faster, but would not be as easy to get nice. I am glad I took the time to make them glue on pieces; so much easier to finish.


Sunday, July 17, 2022

Fiberglassing - Final Stretch July 2022


 7/17/22

This week I got the front and rear skirts smoothed out enough with microballons / epoxy mixture to shot the first coat of primer.

I am using the Sherwin Williams sandable primer that builds up about 0.001" per layer. This stuff is really sweat. It goes on easy, sands well and produces a really smooth finish with 320 grit dry.

After first sanding, I found lots of defects in my fiberglass microballons / epoxy coat. For the final finish coat, I am going to shot over the primer with an Sherwin Williams aircraft paint, not so much to provide a finish painted surface, but rather to protect the primer and my final surface finish for the eventual aircraft painter. This paint and primer is compatible with the glazing compound one finds in the auto parts stores; making filling the pinholes and imperfections much easier and quicker.


For the windscreen, I squeegeed on a pure epoxy coat to fill the imperfections, but this didn't turn out so well. I ended up sanding most of the epoxy away to get it smooth again. The rear skirt I just smoothed with micro and epoxy, but I tried adding cab-o-sil to thicken it, and this was also a mistake. If I ever do this again, I will probably just do two coats of micro and epoxy; the first coat being thick to fill the big gaps, the second being thinner to fill the pinholes and remaining imperfections. 


Fiberglass June 2022 - Rear Skirt

 6/3/22

So the front windscreen is coming along, but turns out fiber-glassing resin is back ordered. So decided to move on to the rear skirt to make the best use of my precise supply.
After several false starts I found a method to bridge the gap and make a nice base for the first layer of fiberglass. I am using thin styrene sheets, with a small bent over lip for support. The orange tape defines the finished edge position. I ended up making a doghouse form out of styrene too.


6/19/22

Rear canopy skirt is glassed. I only used 4 layers because I ran out of cloth. But I am using the Aeroepoxy2032, which has a higher glass transition temperature than West Systems, so after a week, this thing is stiff; it appears there was no need for a thicker layup. (if one is using West System epoxy resin, I think a fifth layer will be needed for strength)

The glass transition temperature is the temperature when the fiberglass starts to go soft once fully cured. West Systems is around 140F and the Aeropoxy 2032 is about 194F. The Aeroepoxy resin with the higher glass transition temperature also seems to be more rigid at room temperature too, and I know it will not go soft when I am out in the desert and the canopy pieces get up there in temperature. Seriously Death Valley gets to 130F


Fiberglassing May 2022

 4/28/22

After taking a few days off, I have started fiber-glassing the wind screen fairing. I am following the excellent tips and tricks from the Osh 2021 presentations. I had visions of making a really neat layup, much like the Osh demo, but that went out the window after my first layup. I am using black tint on the first few layers so when looking from the inside thru the canopy, one would see black fiberglass. Of course, it never occurred to me to use a vinyl tape color other than black, so I am finding it hard to se the tape edge when laying down the fiberglass. It is going much slower than expected, and I am burning thru more glass than I planned.

Onward so I get upward.

June 2022 EDIT: There is no need to add dye to the fiberglass layers if one is using Sika flex or if one is bonding the fairing onto the plane after it has been molded. The exposed pieces will need to be filled and painted anyways, and the part that show thru the plexiglass will be coated with sikaflex black primer. my parts did not come out perfect, so the black fiberglass bits still need filling, priming and painting.


5/7/2022

Front windscreen fiber-glassing is done. I popped it off to trim and finish. Learned a lot this time, but didn't learn enough to make it worthwhile to redo.


5/13/2022

Sanding windscreen fairing. I made a sanding block use my French curve from high school and belt sander. I used Aeropoxy and the stuff is pretty hard and sands well. Next step will be to smooth edges and start filling outside to smooth contour.

The sanding block allows me to sand at an angle and match the desired curve.

I thought I was building a metal airplane.


5/24/22

I think i am getting the hang of fiberglass stuff.

I have been working on the windscreen fairing.
In the las post, I was final sanding the edges to the proper width using the impression of the electrical tape as a guide. this worked out well. the fiberglass picks up every fine detail of the mold, so two layers of electrical on the plane to define the windscreen edge produces a very clear line to sand/trim to.

I am now following DanH's excellent post right here of VAF for the fiberglass finishing. I covered the outside in epoxy (epoxy straight with no fillers or additions) and covered the outside with peel ply (Dacron fabric). This produced a very nice even finish that has grip for the next layer. The next layer was a covering in epoxy and microballons, like DanH suggested.

I started sanding down the micro mixture. I was doing this on the bench, but there it was hard to hold the windscreen and get a good sanding perch. (first picture below). Today I laid down some vinyl tape on the plane, and set the windscreen on the plane to hold it while I sanded. This worked out much better. It was like the holding fixture (the plane) was custom molded to the fixture (uh it actually was) (sarcasm)

Seems this will work out well. This method doesn't seem so bad, I just need to be very careful with sandpaper next to canopies.

I still have to do the rear skirt. But I learned that neatness counts; the better the mold (in this case the placement of the packing tape) the much less work the finishing becomes.


Saturday, April 9, 2022

windscreen Glued in

 original post 4/7/22


I just got the windscreen glued in with sikaflex. What a mess.
First, I made up spacers that go on the roll bar to set the height of the windscreen to match the canopy.
Second, I used 1/2” 3m fine line tape to mark where I wanted the glue on the plane and then matched to the windscreen when in position. I then added fine line tape to each side, and removed the original tape marking the bonding location on both. This left a double line on the windscreen and fuselage defining where the primer and glue would go.
Lastly, I applied activator and primer to canopy and windscreen. Then applied sika to the fuselage (rollbar) and carefully positioned the windscreen on fuselage and clamped.

Once I started breathing again, I pulled off the fine line tape, leaving a nice, clean fillet.

After the sika dries and I get all the stuff out of my hair, I will remove the spacers and fill in the fillet to make it look pretty.


Update, Next time I will remove the tape on the inside, between the windscreen and the glare shield prior to marrying the windscreen to the fuselage/roll bar; it is very difficult to remove once assembled. This means care must be taken in applying the glue to the fuselage and roll bar because the tape will no longer save a messy install.


Windscreen fitting

 original post 3/23/22


I think I have finished the windscreen cutting and fitting. I am happy with the fit. It seems I will only need hold downs in two places, one on each side.

I made a grid system using the rivet lines and one inch spacing to match the left and right sides.

There seems to be little details on how to fit the slider to the top panel. And not a very good picture in the plans or manual. In fact the plans pictures on sheet 41 and 43 are misleading and will cause a ruined windscreen if followed.

I could not find any pictures on the internet or even on VAF that shows the windscreen cut but before the fiberglassing. So here is my contribution. One may use the grid to compare to their windscreen cutting.

This is my first one, so I might be way off base with the fit, so use the data at your own risk.

Next steps:
*Install clips on each side
*Paint glare shield top and center support, probably a light grey
* install center support and egress handles on roll bar
*Sika flex windscreen to plane
*Remove side support clips after sika dries; patch holes and touch up inner glare shield paint
*Fiberglass windscreen and rear skirt
*Remove fiberglass and finish off of plane
*Bond fiberglass skirts to plane using sika


Side Skirts

 Sorry for all the posts, but it seems there isn't much postings on the canopy skirts so here is my contribution.


I have the super track
mod from Flyboy's Accessories. This has been a life saver when working the canopy. The mod requires a cut in the aft end of the track so the canopy can roll up. By utilizing only one roller (like Vans original design) the cut in the track allows me to easily take the canopy on and off. This has been invaluable when doing the side skirts.

I riveted the side skirt and inner brace together while the canopy was off the plane, upside down. this worked out well. Then I installed the canopy and the side skirts. First step was to countersink the holes for the MKS319 blind rivets. This was a little deeper than the standard AN-3 rivets. lastly I added the 3M fine line tape to the bare canopy to make a clean edge for top of the Sika Flex. My plan was to keep the sika flex near the top to prevent junk from getting between the canopy and the top of the side skirts. I figured I also need to prime and bond the sikaflex to the canopy and the skirt to prevent separation as the stuff ages.
I was able to install the canopy on the plane. Then add the sika activator and primer to the skirts on the bench, and onto the canopy. Once the required time elapsed, I applied sika to the canopy. Then I slid the skirts onto the canopy; cleco'd all the skirt rivet holes inside and out, and then started riveting the outside skirt from the middle forward and back, to chase out any kinks.
Once everything was riveted, I made the shaped the fillet between the outside of the skirt and the canopy with my finger, pulled off the fine line tape, and quickly left before I could mess up the wet sika.

I still need to add the two rivets on each side that hold the lift angles.
(Wow, I need to clean the shop; not very photogenic; I have 10 days of cure thou...)
(Truth, I only waited 3 days. I couldn't take the suspense)


Progress and Update

 originally filed 3/13/22 

So lots of progress this weekend.

I was able to match drill the inner and outer skirts with the help of a friend. I learnt that the outer skirt match drilling to the canopy frame is best done with the canopy on the fuselage, so the curve of the skirt exactly matches the curve of the fuselage.

Also, I am thinking about using my version 2 method to attach the outer skirt to the canopy frame. The main difference is using Pro-seal and not sikaflex between the outer skirt and the frame. The reason is that sikaflex requires too much masking, runs when wet, and will be very hard to control due to the inner skirt being in the way of pulling off the masking. Besides, with the rivets per the plans, I do not need to glue the skirts to the canopy frame, just provide a seal. I will save the sikaflex for when I actually need a strong bond.

Below is the version 2 method.

By the way, my nickname

at work was John 
Change S... Always looking to improve.

canopy Ugh

 Canopy; once I get thru this, hopefully I will be done learning as the FAA calls it.


So my side skirts are done and I am ready to bond onto the frame.
But I noticed the skirts wanted to pull in when cleco'd to the frame. So I added some epoxy/flox/cab-o-sil mixture to the spots where the canopy sticks out pass the frame. This allows the canopy skirt to sit nice all the way to the fuselage. In the picture one can see where the canopy was stick out past the canopy frame.

Following the lead of JCarne and Wirejock on these forums (thanks guys). I plane to sikaflex the canopy skirt to the canopy frame. I think I might use the Vans rivets to hold it all together. I am not using the inner skirt C-759 and hardware; instead using a big bead of sikaflex. It has held up for 2 years on the shelf, so it is good to go. The sikaflex on the outer is really just for sealing the canopy bubble to the side skirt.

I painted the outside skirt and brace (C-660 and C791) white to match the canopy frame. Right now everything is pilot drilled 3/32"and cleco'd.
I plan to drill the C791 to the C660 this weekend, then take apart, debur and dimple, countersink for rivets per plans, and re assembly with Van's rivets.

any comments welcomed. I see Wirejock just responded on another thread suggesting to just sikaflex everything together with minimal rivets; gotta think about that.


3/13/2022 EDITI would recommend not drilling the side skirt holes into the canopy frame while the frame is off the fuselage. I would recommend it is best to do this skirt to frame match hole drilling when the frame is on the fuselage. The reason is the skirt is curved. When on the bench, the position of this curve will be close to the fuselage curve, but wont exactly match. If one does this match hole drilling while the canopy frame is on the fuselage, then the curve will exactly match the fuselage curve. I found this out today when I drilled the inner skirt; it is really hard to adjust the outer skirt bend later when trying to drill the inner skirt; the metal is just too stiff.

Also, decided to Proseal instead of sikaflex the outer skirt to the canopy frame, see later posting


3/14/22 ok back to sikaflex. Not sure of the compatibility of proseal to canopy; we know sikaflex is good.


Tuesday, March 1, 2022

Back to Finishing Canopy

 So I am back to the canopy again. I did not do the side skirts a year and a half ago when I was working the canopy because I thought they would be prone to damage during storage.

So I am doing the side skirts now. I am following a friend's method  The side skirts will be the Van's aluminum that are sika-flexed to the canopy and riveted to the canopy frame. I am going to paint the side skirts white to match the canopy frame. I think I found a Jet flex paint that matches the Van's white.

The rear skirt will be fiber glassed and sika-flex bonded to the canopy. (Although my canopy fit is good enough for a metal skirt, I presently have no rivets or screw holes in the plexiglass, and I do not want to add screw holes to hold the metal rear skirt)

The windscreen will be fitted last. I still have to paint the glare shield and the middle brace a light grey before installing the wind screen.


Finishing Up Under Panel

 While waiting to paint the dashboard, i was finishing up stuff under the panel. I decided to make a j bend in the vent tubing to keep the rain out. Not sure if it helps or not, but what the heck, I had the extra tubing anyway.


Last Structural Panel Installed

 We installed the last structural panel this weekend; The forward fuselage top panel.

Now it is on to canopy fiber glassing, cowl
and the gear.

Seats


 I am calling the seats done. I still have to do some of the of the interior stitching but haven't figured out a better way than my first try.
Maybe good enough for first flight. Sure beats pillows.

Since this picture was taken i re did the one seat with the stitching. I think I will leave the interior stitching off so that I can remove the foam and wash the seat covers after the first flight.

Tuesday, January 4, 2022

Fiberglass Work Begins

 Having gone as far as I could go on the instrumentation and engine work, I am starting on the fiberglass bits. This consists of the elevator and rudder tips and the canopy framing.

The fiberglass work is not hard, just takes time due to the cure times. And I was really smart to wait until it gets really cold, and not during the warmer months, to do this work. The epoxy takes forever to cure in the cold. Should have done this work in the summer, but I really wasn't ready then anyway.

The tips come preformed, but require the ends be capped off. I used fiberglass foam, with 2 layers of cloth, followed by an epoxy and micro-balloon mixture. I also sealed the top of the vertical stabilizer to avoid water getting in, if it ever rains in the desert.

The tail light I am using is from FlyLEDS. The Vans rudder fairing has a very small provision for the light. The bracket


that came with the light would not work (gold anodized bracket) so I made a custom one (the aluminum horse shoe shape). The supplied screws are metric, 3.0 x .5 mm.