Saturday, April 9, 2022

windscreen Glued in

 original post 4/7/22


I just got the windscreen glued in with sikaflex. What a mess.
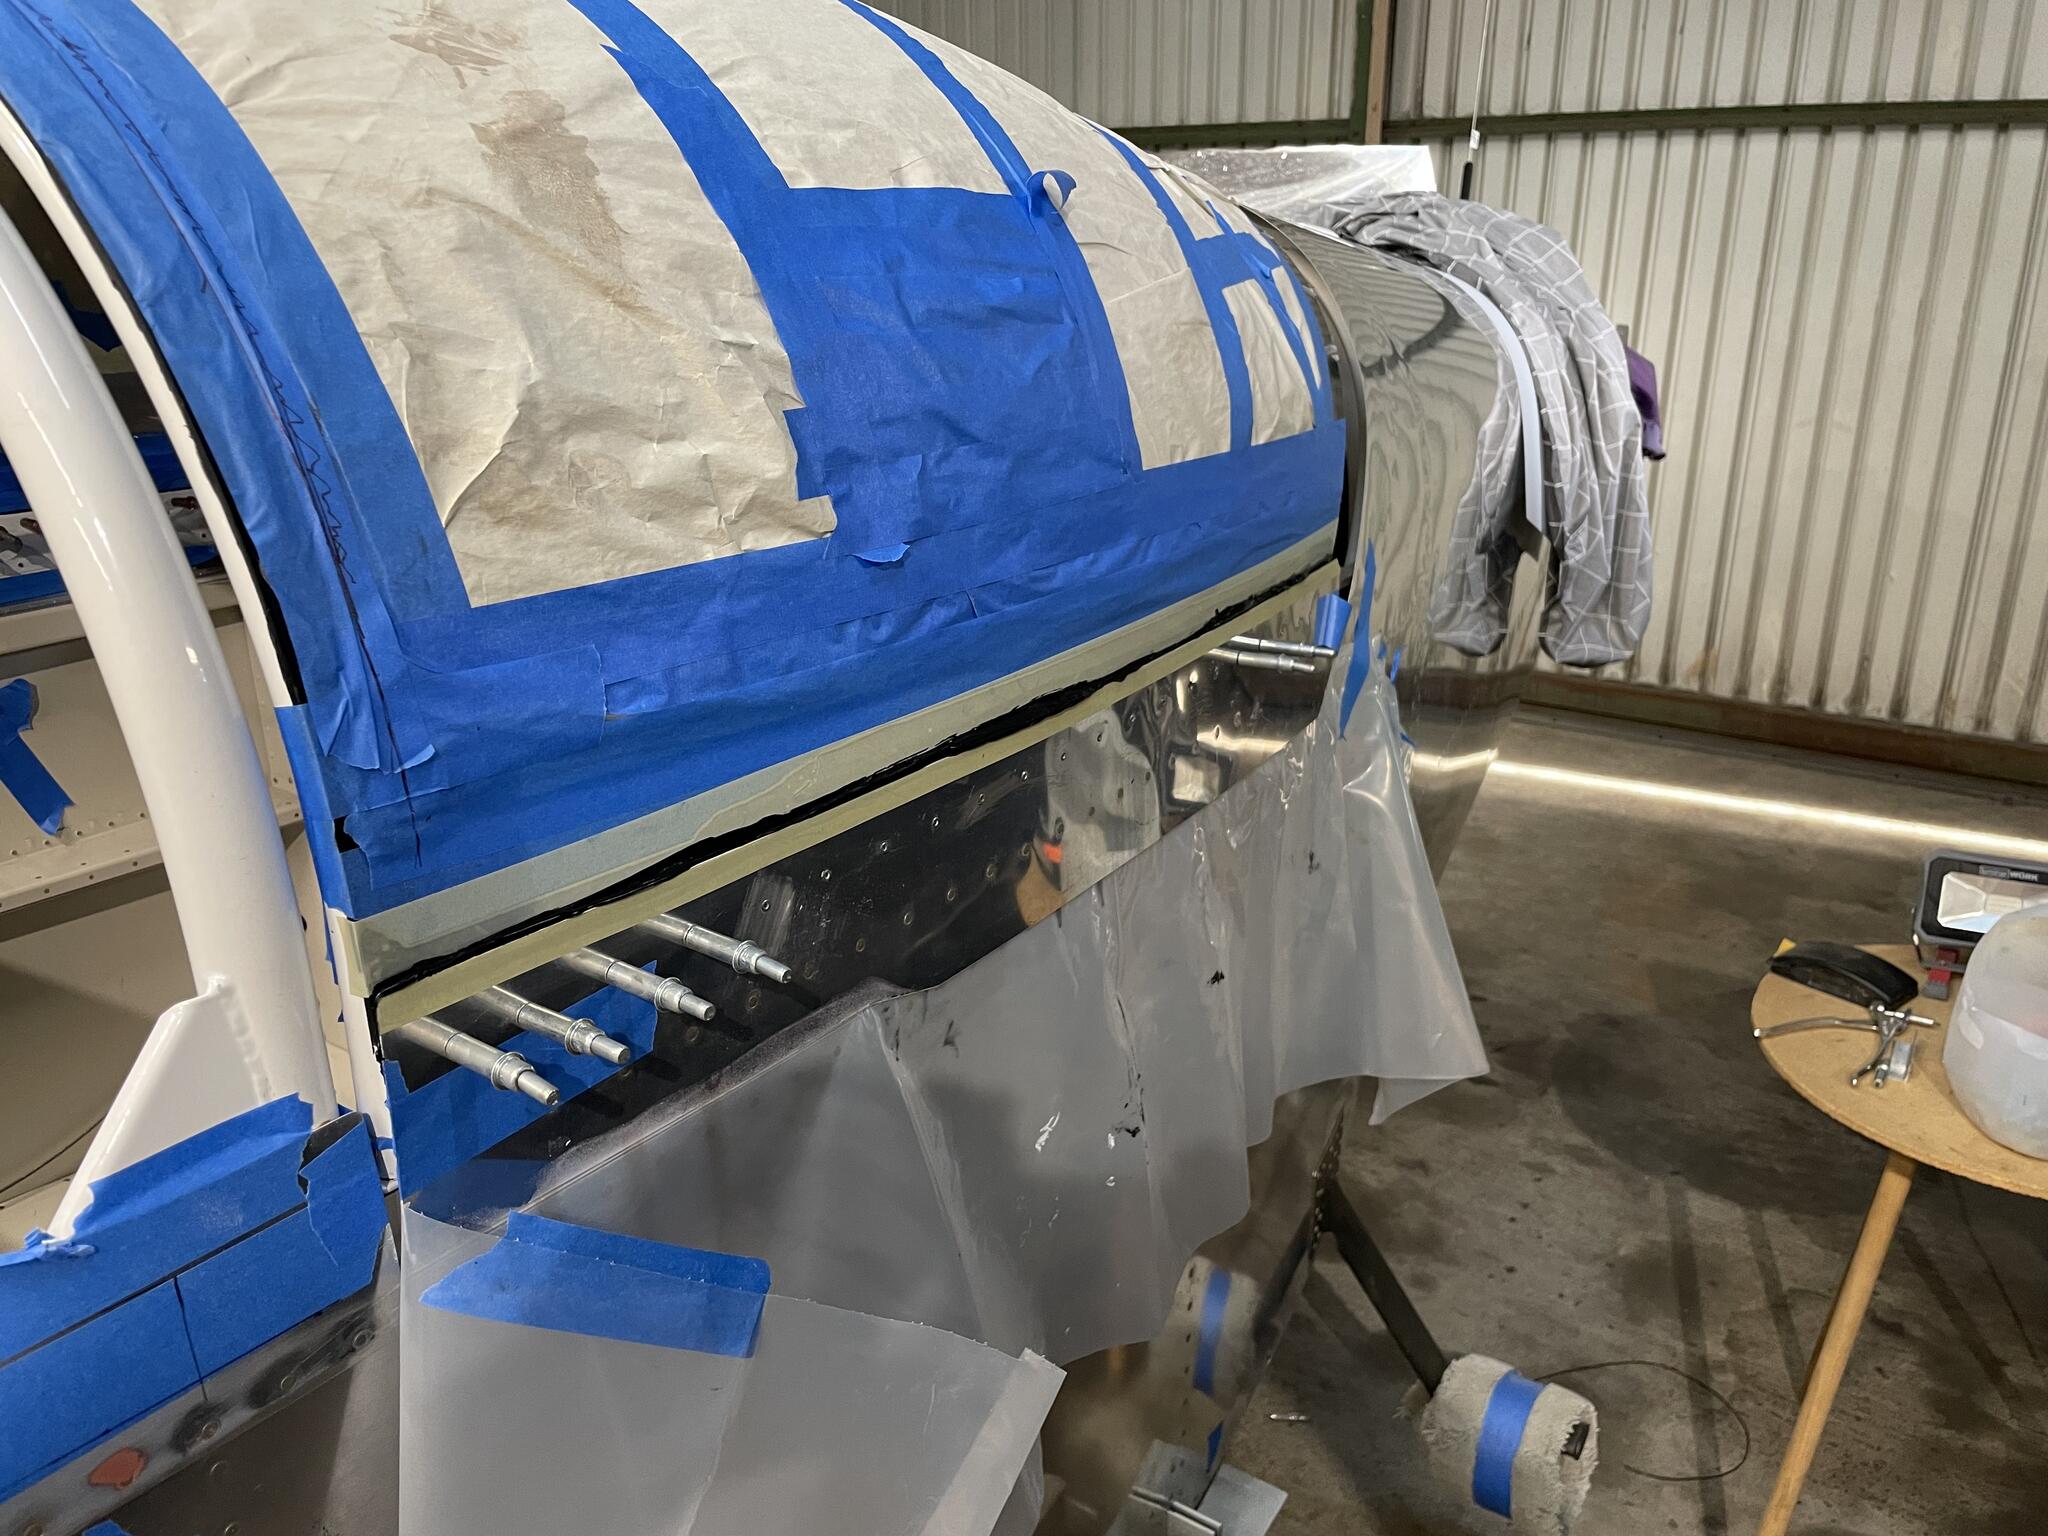
First, I made up spacers that go on the roll bar to set the height of the windscreen to match the canopy.
Second, I used 1/2” 3m fine line tape to mark where I wanted the glue on the plane and then matched to the windscreen when in position. I then added fine line tape to each side, and removed the original tape marking the bonding location on both. This left a double line on the windscreen and fuselage defining where the primer and glue would go.
Lastly, I applied activator and primer to canopy and windscreen. Then applied sika to the fuselage (rollbar) and carefully positioned the windscreen on fuselage and clamped.

Once I started breathing again, I pulled off the fine line tape, leaving a nice, clean fillet.

After the sika dries and I get all the stuff out of my hair, I will remove the spacers and fill in the fillet to make it look pretty.


Update, Next time I will remove the tape on the inside, between the windscreen and the glare shield prior to marrying the windscreen to the fuselage/roll bar; it is very difficult to remove once assembled. This means care must be taken in applying the glue to the fuselage and roll bar because the tape will no longer save a messy install.


Windscreen fitting

 original post 3/23/22


I think I have finished the windscreen cutting and fitting. I am happy with the fit. It seems I will only need hold downs in two places, one on each side.

I made a grid system using the rivet lines and one inch spacing to match the left and right sides.

There seems to be little details on how to fit the slider to the top panel. And not a very good picture in the plans or manual. In fact the plans pictures on sheet 41 and 43 are misleading and will cause a ruined windscreen if followed.

I could not find any pictures on the internet or even on VAF that shows the windscreen cut but before the fiberglassing. So here is my contribution. One may use the grid to compare to their windscreen cutting.

This is my first one, so I might be way off base with the fit, so use the data at your own risk.

Next steps:
*Install clips on each side
*Paint glare shield top and center support, probably a light grey
* install center support and egress handles on roll bar
*Sika flex windscreen to plane
*Remove side support clips after sika dries; patch holes and touch up inner glare shield paint
*Fiberglass windscreen and rear skirt
*Remove fiberglass and finish off of plane
*Bond fiberglass skirts to plane using sika


Side Skirts

 Sorry for all the posts, but it seems there isn't much postings on the canopy skirts so here is my contribution.


I have the super track
mod from Flyboy's Accessories. This has been a life saver when working the canopy. The mod requires a cut in the aft end of the track so the canopy can roll up. By utilizing only one roller (like Vans original design) the cut in the track allows me to easily take the canopy on and off. This has been invaluable when doing the side skirts.

I riveted the side skirt and inner brace together while the canopy was off the plane, upside down. this worked out well. Then I installed the canopy and the side skirts. First step was to countersink the holes for the MKS319 blind rivets. This was a little deeper than the standard AN-3 rivets. lastly I added the 3M fine line tape to the bare canopy to make a clean edge for top of the Sika Flex. My plan was to keep the sika flex near the top to prevent junk from getting between the canopy and the top of the side skirts. I figured I also need to prime and bond the sikaflex to the canopy and the skirt to prevent separation as the stuff ages.
I was able to install the canopy on the plane. Then add the sika activator and primer to the skirts on the bench, and onto the canopy. Once the required time elapsed, I applied sika to the canopy. Then I slid the skirts onto the canopy; cleco'd all the skirt rivet holes inside and out, and then started riveting the outside skirt from the middle forward and back, to chase out any kinks.
Once everything was riveted, I made the shaped the fillet between the outside of the skirt and the canopy with my finger, pulled off the fine line tape, and quickly left before I could mess up the wet sika.

I still need to add the two rivets on each side that hold the lift angles.
(Wow, I need to clean the shop; not very photogenic; I have 10 days of cure thou...)
(Truth, I only waited 3 days. I couldn't take the suspense)


Progress and Update

 originally filed 3/13/22 

So lots of progress this weekend.

I was able to match drill the inner and outer skirts with the help of a friend. I learnt that the outer skirt match drilling to the canopy frame is best done with the canopy on the fuselage, so the curve of the skirt exactly matches the curve of the fuselage.

Also, I am thinking about using my version 2 method to attach the outer skirt to the canopy frame. The main difference is using Pro-seal and not sikaflex between the outer skirt and the frame. The reason is that sikaflex requires too much masking, runs when wet, and will be very hard to control due to the inner skirt being in the way of pulling off the masking. Besides, with the rivets per the plans, I do not need to glue the skirts to the canopy frame, just provide a seal. I will save the sikaflex for when I actually need a strong bond.

Below is the version 2 method.

By the way, my nickname

at work was John 
Change S... Always looking to improve.

canopy Ugh

 Canopy; once I get thru this, hopefully I will be done learning as the FAA calls it.


So my side skirts are done and I am ready to bond onto the frame.
But I noticed the skirts wanted to pull in when cleco'd to the frame. So I added some epoxy/flox/cab-o-sil mixture to the spots where the canopy sticks out pass the frame. This allows the canopy skirt to sit nice all the way to the fuselage. In the picture one can see where the canopy was stick out past the canopy frame.

Following the lead of JCarne and Wirejock on these forums (thanks guys). I plane to sikaflex the canopy skirt to the canopy frame. I think I might use the Vans rivets to hold it all together. I am not using the inner skirt C-759 and hardware; instead using a big bead of sikaflex. It has held up for 2 years on the shelf, so it is good to go. The sikaflex on the outer is really just for sealing the canopy bubble to the side skirt.

I painted the outside skirt and brace (C-660 and C791) white to match the canopy frame. Right now everything is pilot drilled 3/32"and cleco'd.
I plan to drill the C791 to the C660 this weekend, then take apart, debur and dimple, countersink for rivets per plans, and re assembly with Van's rivets.

any comments welcomed. I see Wirejock just responded on another thread suggesting to just sikaflex everything together with minimal rivets; gotta think about that.


3/13/2022 EDITI would recommend not drilling the side skirt holes into the canopy frame while the frame is off the fuselage. I would recommend it is best to do this skirt to frame match hole drilling when the frame is on the fuselage. The reason is the skirt is curved. When on the bench, the position of this curve will be close to the fuselage curve, but wont exactly match. If one does this match hole drilling while the canopy frame is on the fuselage, then the curve will exactly match the fuselage curve. I found this out today when I drilled the inner skirt; it is really hard to adjust the outer skirt bend later when trying to drill the inner skirt; the metal is just too stiff.

Also, decided to Proseal instead of sikaflex the outer skirt to the canopy frame, see later posting


3/14/22 ok back to sikaflex. Not sure of the compatibility of proseal to canopy; we know sikaflex is good.