Monday, May 29, 2017

Fuel Tanks

I have been working on the fuel tanks. The Pro-seal is about to expire, so have been a mad man trying to get the tanks together.
Everything went per plans, but did some things that made it easier. Since I am doing both wings at the same time, the tooling and jigs get setup and taken down only once, so things go quick.
I made a template and verified the tank leading edge shape matched the outboard leading edge. The left wing I nailed perfectly, but the right I had to disassembly the ribs and tweak slightly. I also made the end ribs of the tank fit the curve of the skin as near perfect as possible to minimize the gap the Pro-seal has to fill in.


For the tank brackets I made a wood jig to hold the brackets and get the middle hole centered. Of course, all the brackets came from the factory exactly same length, except for two.Oh well.

The brackets are installed on the baffle and the line centered in the baffle holes. Then the remaining holes are drilled using the baffle as the drill guide. I found out that the baffle is not symmetrical; there is a top and bottom. In addition, the baffle flange orientation is mirrored on the right, but not shown explicitly on the plans, leading to additional confusion. You are warned.
After the brackets are drilled to the baffle they are installed on the tank, and the tank is installed on the wing for match drilling to the spar. There were several gotchas:
1) The baffle has a top and bottom, the prepunched holes are not symmetrical top to bottom.
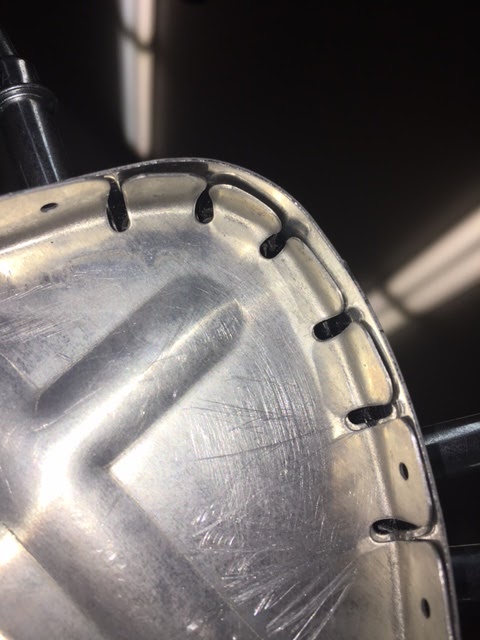
2) The distance from the baffle to the spar is too close for clecos near the root. If I tried to use clecos to hold the tank skin to the baffle, the baffle and wing tank did not sit on the wing properly.
3) others have dimpled the baffle rivet holes; I don't see how this would work on the RV9 since there is not enough clearance; I think the baffle rivet holes need to be countersunk per the plans.

After the brackets are match drilled to the spar, the riv-nuts are installed. I used a bolt and nut to drill the brackets for the rivets as in the pic. (The hole in the wood is for the nut to rest in.)


The rest went as per plans, nothing special. Prior to priming, I edge rolled the seams very slightly using my thumb technique. Not sure if this is needed, but I do not want any of the skins lifting off the spar and I could not find anyone on line who regretted doing this.
Lastly, I primed in prep for final assembly. The plans say only the bracket needs to be primed, but my minimum amount to mix easily is 50 ml.  Not wanting to waste any, I primed the outside of the skins where they will rest on the spar and splice plate, and I primed the outside of the two end ribs, and the backside of the baffle. I am thinking the tanks may sweat when full of fuel, so I figure it wouldn't hurt to prime the outside that is exposed.

With all this work, I think I am ready for final assembly of the tanks. Hope I have enough clecos ;-)


Tuesday, May 2, 2017

Harvesting Clecos for Wings

So have started building the wings. Not much to write about as everything started out well and went as per plans. Of course as I was saying this to myself I did find some "knowledge" was needed, and a few bandages. But I am getting ahead of myself.

Here is the bountiful harvest of clecos.  And a warning. Just go ahead and order a thousand 3/32 clecos; if ordered all at once, there is a break in the price at a thousand, and the shipping is only one time. I am on my fourth cleco order; UPS is making bucks on shipping. Here is my cleco farm, ready for harvest. I am doing both wings at the same time, so this is only one of the two wings, Yes I ran out of clecos; the rest are coming in time for the tanks. Total cleco count will be slightly more than a thousand.
The main skins went on as per plans, no really drama, except I had a few holes in the rear spar where the holes in the rib, spar and skin didn't line up. Next time I need to make sure the rib holes line up with the rear spar during the rib to rear spar riveting. It is kind of tough to do it after the rib to spar rivets are in.

I didn't quite follow the plans when I put the J stringers in. I indeed drilled through my finger, even though the plans say  "be careful don't drill through your finger"

The leading edge ribs are notoriously for being hard to fit into the skin. After reading many blogs of those who came before, I decided to reshape the leading edge ribs.  During my first attempt, when the virgin ribs were inserted into the leading edge skin, the rib flanges were actually warping from straight in order to fit the leading edge radius of the pre bent skin. This is ugly, and causes scratches and bumps on the leading edge of the skin. When compared to the fiberglass tip, I think the pre-bent skins have a  different leading edge shape causing a poor fit.  After reading many blogs of those who came before, I decided to reshape the leading edge ribs. Here is a picture of the virgin rib fitting onto the skin. Notice how the tabs in front of the prepunched hole are holding the skin away.


 Everything fits much better with a small tweak to the flange. I am being careful to make the left and right wings the same, since this portion of the wing contributes to the flying qualities. Here is a picture of the reworked rib installed on the left leading edge. There is still a gap between the rib and the leading edge. I don't think it hurts anything, but I might throw some extra Proseal in there when I do the tanks.
I also had an interference on one of the rib to the spar rivets. This is the rib closest to the tank. Not hard to take care of. I am continuing on and looking forward to the Proseal Challenge.