I didn't want to buck all the rivets because my bucked rivets are not as good as those when I use the squeezer. So I had to buy a 4" yoke for the squeezer to reach the rivets.
Also the screws that hold the lead counter weight are #10 with a 100 degree countersink. So had to get a #10 dimple die for this screw. Lastly, I had to relieve the lead weight to clear the forward most rivets of the rib.

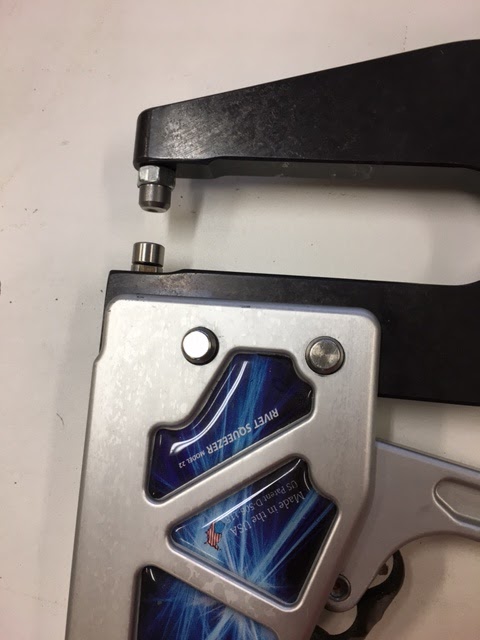
I needed what is called a longeron yoke to get the rivets on the control bracket, but didn't have one. I ended up putting a nut under the rivet set on the squeezer and this worked.
When I riveted on the doublers and nut plates to the spar, the 3/8" heim joints would not screw in. So I drilled out the rivets, inserted the heim joints in the nut plates and then riveted the doublers and nut plates to the spar. This was the only way to get everything lined up while riveting and I had to use the 4" yoke and longeron trick.
To make the trailing edge angle tooling that will hold it straight while assembling, I match drill all the trailing edge parts, then double sided taped the AEX strip to the aluminum angle and match drilled the angle to the AEX strip using the drill press.
When countersinking the trailing edge AEX piece I made a simple wood jig and used a allen wrench that was just big enough to hold the trailing edge flat.

No where in the instruction manual did it say when to rivet on the rudder bracket. This should be done just before the first skin is riveted on. I riveted the top of the skin near the balanced weight, and then had to carefully lift it up to get the rivets squeezed holding the bottom bracket; it would have been better to do the bracket before the skin.
As per the instructions, I bonded the trailing edge together with pro-seal using the aluminum angle tooling on the outside to keep everything straight, waited three days, and then riveted. The trailing edge came out straight, but I seem to have gotten some separation of the trailing edge skins from the AEX wedge, and some pillowing between the rivets. This really bothered me until I read other blogs, and I am not the first. There is pro-seal on all the surfaces, so it is not an adhesion problem. Maybe it was too thick. Next time I will use a scrap pick of angle and squeeze the trailing edge together using seaming pliers immediately after assembly. This should squeeze out the extra pro-seal leaving a very thin layer to bond, hopefully eliminating the pillowing. For the separation, I tried re-riveting the end but it didn't change anything. It is acceptable, just not preferred. Maybe in a year or two, if I haven't come up with anything better, I was thinking of adding some JB weld to the seam to fill in the gap, making for a rigid, impervious, blunt trailing edge; nothing I can do about the pillowing an it is very slight.

No comments:
Post a Comment