Tank assembly begins!
The bottom stiffeners were installed as per plans. I mixed up 1 gram of Proseal per linear inch and this was just about right, taking into account losses from leaving stuff on the mixing plate, smeared on the ceiling, etc. Did I mention this stuff gets everywhere?
I decided to use the "faying surface sealing method". The next day, I mixed up another batch of Proseal per the instructions, and using the baggy technique, applied it to the ribs. I then cleco'd the ribs to the bottom skin using a cleco in every hole.
In the same session, I mixed a second batch and applied Proseal to the top of the ribs, inserted the tank into the frame and cleco'd the top of the skin to the ribs again using a cleco in every hole. Then I smoothed the excess bleed out with the tip of the plastic knife, and let it set overnight. I added tape to keep the skins from spreading due to the Proseal's viscosity.
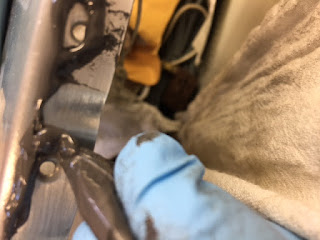
The next day, I came back and removed every cleco four at a time, and used the #40 (-3) countersink to clean up the dimples. This removed the excess squeeze out and removed a sliver of aluminum to provide virgin material for the rivet to seal against.
I did not use "tank dies" because I don't believe in them. Tank dies are special dies only that set the rivet a few thousandths deeper. The theory being this allows the rivets to sit flush with a thin layer of Proseal in between the rivets and the skin. I think this is nonsense. Using normal dimple dies, the Proseal squeezed out during riveting and all that remained was what was needed to fill in the voids; I don't see a reason why there needs to be a thicker film of Proseal between the rivet and skin. Just my opinion.
Update-A factory engineer wrote the following reply: I also have some concerns about the use of tank dimple dies, but in my
opinion, by installing the ribs and then waiting to rivet, you just
moved the thick build-up of sealant from between the rivet and skin, to
between the skin and the rib.
The squeeze force of a cleco is much lower than what is exerted when setting a rivet.
The sealant is very viscous and doesn't easily squeeze out from between the rib and skin.
I am pretty sure that just installing clecos and then letting the
sealant cure before riveting leaves a much thicker layer of sealant
between the rib and the skin. Far less desirable than the result
attained if riveted wet, in my opinion.
Comment: I still prefer the Fay sealing method I used and described above. I am afraid by wet installing the rivets, the skin may pucker between the rivets; there is heavy force on the rivets and no force between the skins when wet riveting, in my opinion.
The riveting went fine. I had to drill out a few clinchers, because the Proseal makes everything slippery. Also, if I didn't press the rivet down in the hole and squeeze out the excess, I would invariably get a rivet sitting proud. I used a hemostat to place the rivet in the hole filled with Proseal, pushing lightly to squeeze out the excess goop. Then I cleaned off the outside with a acetone-damped rag, cleaned the mushroom set, and riveted. I found using lower air pressure and feathering the trigger helped set the rivets without clinching. With 30 grams mixed, I was able to set 3 rows on the bottom, coat the shop heads, and fillet the three ribs, before the stuff started getting hard. It took me three nights over a week to get each skin on. With this fay sealing method, there was not a rush to set all the rivets in one session; I felt this made for much better results because I wasn't stressed trying to rivet everything before the Proseal set up.
The tanks skins and ribs are all riveted now. Looking back, I don't know why I was so apprehensive, but it was a learning experience. As a side note, I used MEK to clean the faying surfaces, but switched to acetone to remove the excess Proseal to try and preserve my MEK for more important tasks; I can no longer buy MEK locally.


No comments:
Post a Comment