
Tuesday, April 10, 2018
Roadie Box
So the wings are done, but how to store them? So I decided to use the pieces of excellent wood from the shipping crates to modify the gifted wing stand and build a roadie box. This will store the wings and prevent any hangar rash. Here is a picture before the top and ends were attached. Like everything else I thought this would be a 1 day project, but alas, it took me a while longer.


Monday, March 5, 2018
Wings..done
Wings are done. Took me 13 months, but I am happy with the results. A big thank you to all those who helped. Now I need to remove the blue plastic and build a roadie box for long term storage. Yeah!

I will add the tips and avionics during the finishing stages; its too early to buy the avionics.
 Here is a picture of the pitot and AoA tubes. I just heated them up and slide them on. The metal tube was prepared by plugging the tubing to keep the curd out, rounding the end, abrading the last 1/2" so the plastic tube would stick better, then removing the temporary plugs. Also visible is the bracket to hold the conduit away from the access cover screws.

I will add the tips and avionics during the finishing stages; its too early to buy the avionics.

Saturday, February 3, 2018
Wings - It Is the Little Things

It is the little things that take the time, but these little things seem to be less stressful. Let me explain. I was stressing about finishing up the trailing edge of the flaps. So stressed that I went ahead and installed the Garmin autopilot roll servo while I worked up the nerve.
I originally laid out the wiring to have the roll servo in the left wing. Then I read the instructions and realized it goes in the right wing. So I redid my wing wiring diagram and followed directions for the installation.
Today I got up the nerve to tackle the trailing edge riveting. I had prosealed the trailing edge last week and left it clecoed to the building table to dry. When I pried it loose from the table this morning, I was surprised that the trailing edge was dead straight. I could not see any warpage at all. Amazing considering this thing is, like, seven feet long. OMG.
The riveting was non eventful although I did deviate from the instructions a little. The instructions say to do the bottom of the trailing edge rivets half way and then flip the flap over and do the rivets the rest of the way from the top side. But with the flaps, the flap attachment brackets stick down and I felt it would be nearly impossible to keep the flap flat and true. So I did all the rivet setting from the bottom making sure to keep the flap absolutely flat throughout the process. In a little over an hour, both flaps were done. Easy peasy. Installing them was straight forward as Sponge Bob watched.
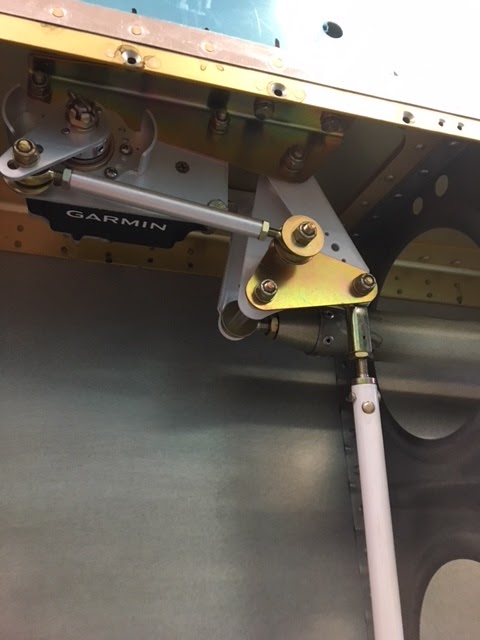

I riveted the aileron push rods, but I think it is best to weld these per the optional note on the plans. The rivets near the aileron side come very close to interfering with the spar hole. At the extreme travel, I could see where this could cause some binding. These rods will be modified and welded while the wings are in storage.
Below are my bushings and top bolt lengths, for reference. A lot of fiddling, but nothing too difficult or confusing. I measured the travel at 19 degrees down and 31 degrees up. This should be sufficient.

Here is my build table for the flaps and ailerons. Not sure if I am going to give this away or re-purpose it for a fuselage cart.

Sunday, January 21, 2018
Flaps
Moving on to the flaps.
It is after New Years and I still have a little bit left on the wings, namely the flaps and the internal mechanisms.
The normal match drilling and bracket fabrication went as per the instructions, no drama there. The spar is countersunk for AD3 size rivets. The normal method is to go 0.007" deeper to have the spar dimple mesh better with the skin's dimple. However this spar is barely 0.040" thick and this would have enlarge the holes in the spar, so I only went 0.002" deeper.
I primed and painted the inside of the flap bracket prior to assembly; I didn't feel this could get painted by the painters once assembled. I also painted the edges of the spacer. When riveting together I found some old hobby spruce that fit very well as a spacer when clamped in the vise.

When bucking the spar to skin rivets, I used a scrap piece of thin plywood to protect the spar. The plans call out AD3-3.5 rivets but these are just barely long enough. I used -3.5's on the top spar to skin because these were easy to set and easy to get a precise smash down within spec. However, for the bottom skin to the spar, I used AD3-4's. The extra length made it easy to set within spec without having to really worry about get it exact; these rivet are set blind so are hard to inspect and harder to gauge when being driven. Using the longer rivets and having previously set the spar countersink depth at the low end, the riveting came out nice.

 All that is left is pro-sealing the trailing edges and trailing edge riveting.
It is after New Years and I still have a little bit left on the wings, namely the flaps and the internal mechanisms.
The normal match drilling and bracket fabrication went as per the instructions, no drama there. The spar is countersunk for AD3 size rivets. The normal method is to go 0.007" deeper to have the spar dimple mesh better with the skin's dimple. However this spar is barely 0.040" thick and this would have enlarge the holes in the spar, so I only went 0.002" deeper.
I primed and painted the inside of the flap bracket prior to assembly; I didn't feel this could get painted by the painters once assembled. I also painted the edges of the spacer. When riveting together I found some old hobby spruce that fit very well as a spacer when clamped in the vise.

When bucking the spar to skin rivets, I used a scrap piece of thin plywood to protect the spar. The plans call out AD3-3.5 rivets but these are just barely long enough. I used -3.5's on the top spar to skin because these were easy to set and easy to get a precise smash down within spec. However, for the bottom skin to the spar, I used AD3-4's. The extra length made it easy to set within spec without having to really worry about get it exact; these rivet are set blind so are hard to inspect and harder to gauge when being driven. Using the longer rivets and having previously set the spar countersink depth at the low end, the riveting came out nice.

I used tape to hold open the skins while riveting the skins. This helped, but it was too easy to open the skins too wide and create a gap between the skins and the spar.

Sunday, December 24, 2017
The End is Near
The end is near, both of 2017 and this wing build.
The ailerons are finished, and I am quite happy with the results. One aileron trailing edge is dead straight, the second took a little work to get out a very minor ripple; I think the ripple was caused by not riveting the trailing edge together as soon as the pro-seal was dry and letting the trailing edge sit unclamped for a few days. No worries should be fine.
I think the secret to building ailerons with no twist is the leading edge straightness. I spent a little extra time making sure the bottom skin was absolutely flat from the stainless steel leading edge weight to the spar. Since drilling the leading edge is very difficult due to the super hard stainless steel, I ended up having some extra "lightening" holes in the stainless steel bar. During final assembly, I made sure the leading edge ribs sat flat on my super flat surface plate (kitchen granite counter top). Once the leading edge is riveted to the spar, the aileron becomes enormously stiff. I am glad I took the extra time to make this part perfect.
 For the trailing edge drilling, I make a simple metal guide; should have done this long ago.

I am currently working on the flaps and planning out the internal stuff the needs to go in before the bottom skins are on. I am thinking I will fully install the heated AoA pitot tube, and the autopilot servo for the future G3x panel. I am planning the magnetometer for the right wing tip and the VOR antenna for the left. So my present plan is to not pull any wires for those until the tips go on in a year or two. The wings already have conduit for the wiring, so pulling the wires should be easy.
As for the lights, I saw some new Baja Design that seem choice, but with the pace of technology, still not sure if I will install now.
The ailerons are finished, and I am quite happy with the results. One aileron trailing edge is dead straight, the second took a little work to get out a very minor ripple; I think the ripple was caused by not riveting the trailing edge together as soon as the pro-seal was dry and letting the trailing edge sit unclamped for a few days. No worries should be fine.
I think the secret to building ailerons with no twist is the leading edge straightness. I spent a little extra time making sure the bottom skin was absolutely flat from the stainless steel leading edge weight to the spar. Since drilling the leading edge is very difficult due to the super hard stainless steel, I ended up having some extra "lightening" holes in the stainless steel bar. During final assembly, I made sure the leading edge ribs sat flat on my super flat surface plate (kitchen granite counter top). Once the leading edge is riveted to the spar, the aileron becomes enormously stiff. I am glad I took the extra time to make this part perfect.


I am currently working on the flaps and planning out the internal stuff the needs to go in before the bottom skins are on. I am thinking I will fully install the heated AoA pitot tube, and the autopilot servo for the future G3x panel. I am planning the magnetometer for the right wing tip and the VOR antenna for the left. So my present plan is to not pull any wires for those until the tips go on in a year or two. The wings already have conduit for the wiring, so pulling the wires should be easy.
As for the lights, I saw some new Baja Design that seem choice, but with the pace of technology, still not sure if I will install now.
Friday, November 17, 2017
Progress too
Making steady progress on the wings. Everything pretty much to plan. One note: the instructions were written long before the extra aileron brace was engineered. So the instructions say to install the aileron brackets before the flap brackets. This build order needs to flip around now. The flap brackets need to be installed prior to the aileron brackets since the extra reinforcing interferes with the rivets as seen in the picture below.
 One thing to note, the bottom skin rivets can still be accessed with this brace in place; on the RV7, I believe the brace interferes with the skin rivets, not a problem on this RV9.
Moving on now with the flaps and ailerons.....

Moving on now with the flaps and ailerons.....
Friday, September 22, 2017
Wing Skins
Look no clecos! A few of the rear spar rivets are still not in near the root; it seems these will be easier to squeeze once the wings are out of the build stands.
The easiest way I found to do this was from the trailing edge. Starting with the center rib of each skin, I would rivet the skin to the rear spar between the two center ribs. Then work up from the trailing edge on each rib. I could just reach the fourth rivet above the J stringer by laying on a creeper.

After each skin was done on the lower portion, I would then corral a helper and rivet each rib the rest of the way up and then the main spar. I found a helper with a tungsten bucking bar was the easiest. I also used a wi fi endoscope camera hooked to my iPad so I could see around the other side and validate each rivet as we went. For $40 on amazon, the endoscope camera was well worth it. After a while, my friend would understand a good rivet and we would move along.
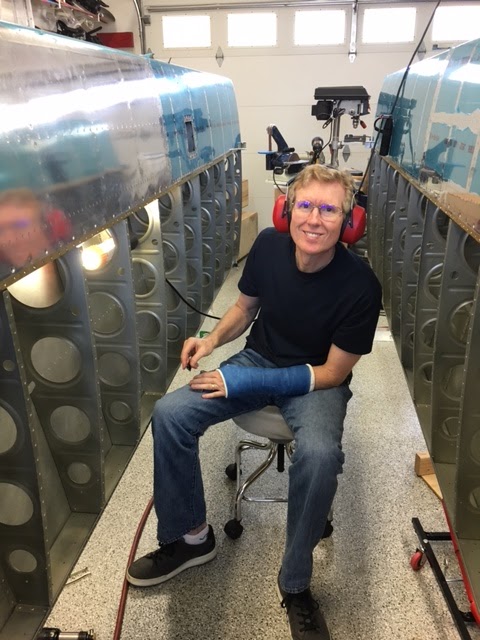
I took advantage of my rivet buddy not wanting to go home (because of traffic, not the wife, so he said) and was able to get all the top rivets on the right wing too. The rest I can get from the bottom with a creeper.

After checking the twist, everything is as before. I did notice the right skin had to be cleco'd in a certain order to get all the holes to line up, so I ended up clecoing the skins on twice and using a cleco in every hole. There must have been some sag the first time. I am glad I didn't start riveting until both skins were on and fully cleco'd in place.
Subscribe to:
Posts (Atom)